Thursday, October 30, 2014

The list...

The official HARA flying season ends in October... While there may be small personal launches here and there, November through February is what we rocketeers call the "build season", in which one replenishes supplies and gets new and old rockets ready for the start of the flying season in March. High power rocketeers will usually have some big "winter project" - a ginormous vehicle that sucks up many man hours to wow the crowds at the Spring launches. Us low power folks have what we call "The List" - a list of rockets we intend to build and finish over the cold winter months. Every year, I carefully make one of these... And every year, my rocket ADD renders it worthless by December. This time I have sworn to stick to it - which is also the same promise I have made in past years. Hopefully this year will see a breakthrough.

So dear readers, here is "The List" for this winter:

  • Big Bertha - No brainer. No fleet is complete without a Bertha, and mine was put out of commission at the Rocket City Blast Off.
  • Beulah - A Big Bertha derivative, featuring a two motor cluster. Inspired by Chris Michielssen's Big Girtha.
  • S.S. Cestris by Sirius Rocketry - Been wanting to build this kit for some time.
  • Estes Gyroc clone - Always wanted to build one of these "Helicopter recovery" rockets. A classic.
  • SpaceX Falcon 9
  • Estes Scrambler clone - The quintessential egg lofter. never had one of these as a youngster, though I really, really wanted one.
  • Tiny Tim scale model - Have the parts, have the design, time to get this puppy built.


Tiny Tim air to ground rocket (Click to enlarge).

This will keep me busy for a bit. And if I know me, there will be some other rockets built this winter :)

Saturday, October 25, 2014

The Rocket City Blastoff

Last Saturday saw the revival of the Rocket City Blast Off, an annual launch HARA used to host back in the 1980's and 90's. Held at the Old Airport (now John Hunt Park) in Huntsville, the RCBO provided an opportunity for residents of Huntsville to come out and fly rockets without having to look for a field or worry about setting up launch pads. HARA provides the range, complete with launch pads for rockets up to G motor impulse and the appropriate folks to assist in helping people get their birds up in the air. I was the unofficial organizer of this year's launch, and was lucky to get lot of good support from the club and the local chapter of the American Institute of Aeronautics and Astronautics (AIAA). The latter was terrific at generating publicity and also managed to get a couple of interesting exhibits, such as suitcase rocket motor demonstrations.

Rocket City Blast Off banner (taken as we were breaking down the range).

Even though I was very busy in the first 3 hours of the launch (which lasted from 10 AM to 3 PM), I did manage to fly 5 rockets:

  • Estes Porta Pot Shot - The flying porta potty produced a fairly nice flight on a C6-3. Launding on the defunct runway asphalt was a bit rough, but no damage.
  • Estes Spirit - One of the new ARTF (almost ready to fly) kits, this patriotic rocket flew on a B6-4. Landed in the grass under a fully deployed parachute.

My Spirit leaves the pad on a B6-4 (click to enlarge).

  • Estes Red Max - This battered veteran took to the air once again on a B6-4. Nice soft landing on the grass.
  • Estes Snitch - Nothing but a C motor in this flying saucer - it's very draggy. The C6-0 took it to maybe 100 feet before it fell to the asphalt.
  • Estes Big Bertha clone - This was the last flight for this 10 year old bird. Launched on a C6-3, it took my keychain camera up to about 250 feet or so; unfortunately, the parachute did not deploy, resulting in the body folding up like an accordion when the rocket slammed into the pavement. The camera survived, but the rocket is not worth repairing - in addition to the crumpled body tube, the motor mount was also shoved forward into what's left of the body tube. The flight video is below - as you can tell, the landing was a bit rough :/


Despite the loss of the Bertha, it was a very, very good launch. There were over 120 flights, many made by a bunch of cub scouts who came out to fly their just-built rockets. A lot of fun was had by all, and we agreed that we must have an RCBO in the coming year. I hope it becomes an annual event, just like its predecessor. It would be a nice way to end the flying season of each year!

Only real problems with John Hunt Park are the numerous power lines
leading to the fields and facilities. The RCBO saw only one victim; unfortunately
it was a very nice Estes AMRAAM (click to enlarge).


Wednesday, October 22, 2014

Building Rockets, Finale – Decals

A lot of the new rockets come with “peel ‘n stick” stickers these days, rather than decals. Many rocketeers call these “peel ‘n cuss”, because they are not much fun to apply (especially roll patterns and long names) due to their stickiness – very little room to make a mistake. They are also pretty thick and often show bubbles and other raised areas. As a result, many of us will scan the stickers and either print them out on decal paper or get Excelsior or Tango Papa to do this for us. Regular decals are nice – they are thin, adhere well to the rocket without unsightly bubbles and blemishes, and are generally very forgiving when it comes to placement.
Applying decals is more than sink in water for a few seconds, then stick on rocket. Here are a few tips I have learned over the years:
  • Wait a few days after painting before applying decals. This gives the paint time to thoroughly dry and outgas. A good rule of thumb is “if you can smell the paint, don’t apply the decals.”
  • Be sure you have a small clean rag to wipe away water and smooth out bubbles on the decal.
  • Submerse the decal in warm water for 30 seconds or so. Some rocketeers – like me – also add a drop of dish soap to the water, claiming that it helps the decals slide off the backing easier. Be sure the water stays warm; if you have a fair number of decals to apply, you may have to change it a few times.
  • Wet the area of the rocket that will receive the decal before you apply it – this will allow you to position and move the decal around until you have it just right.
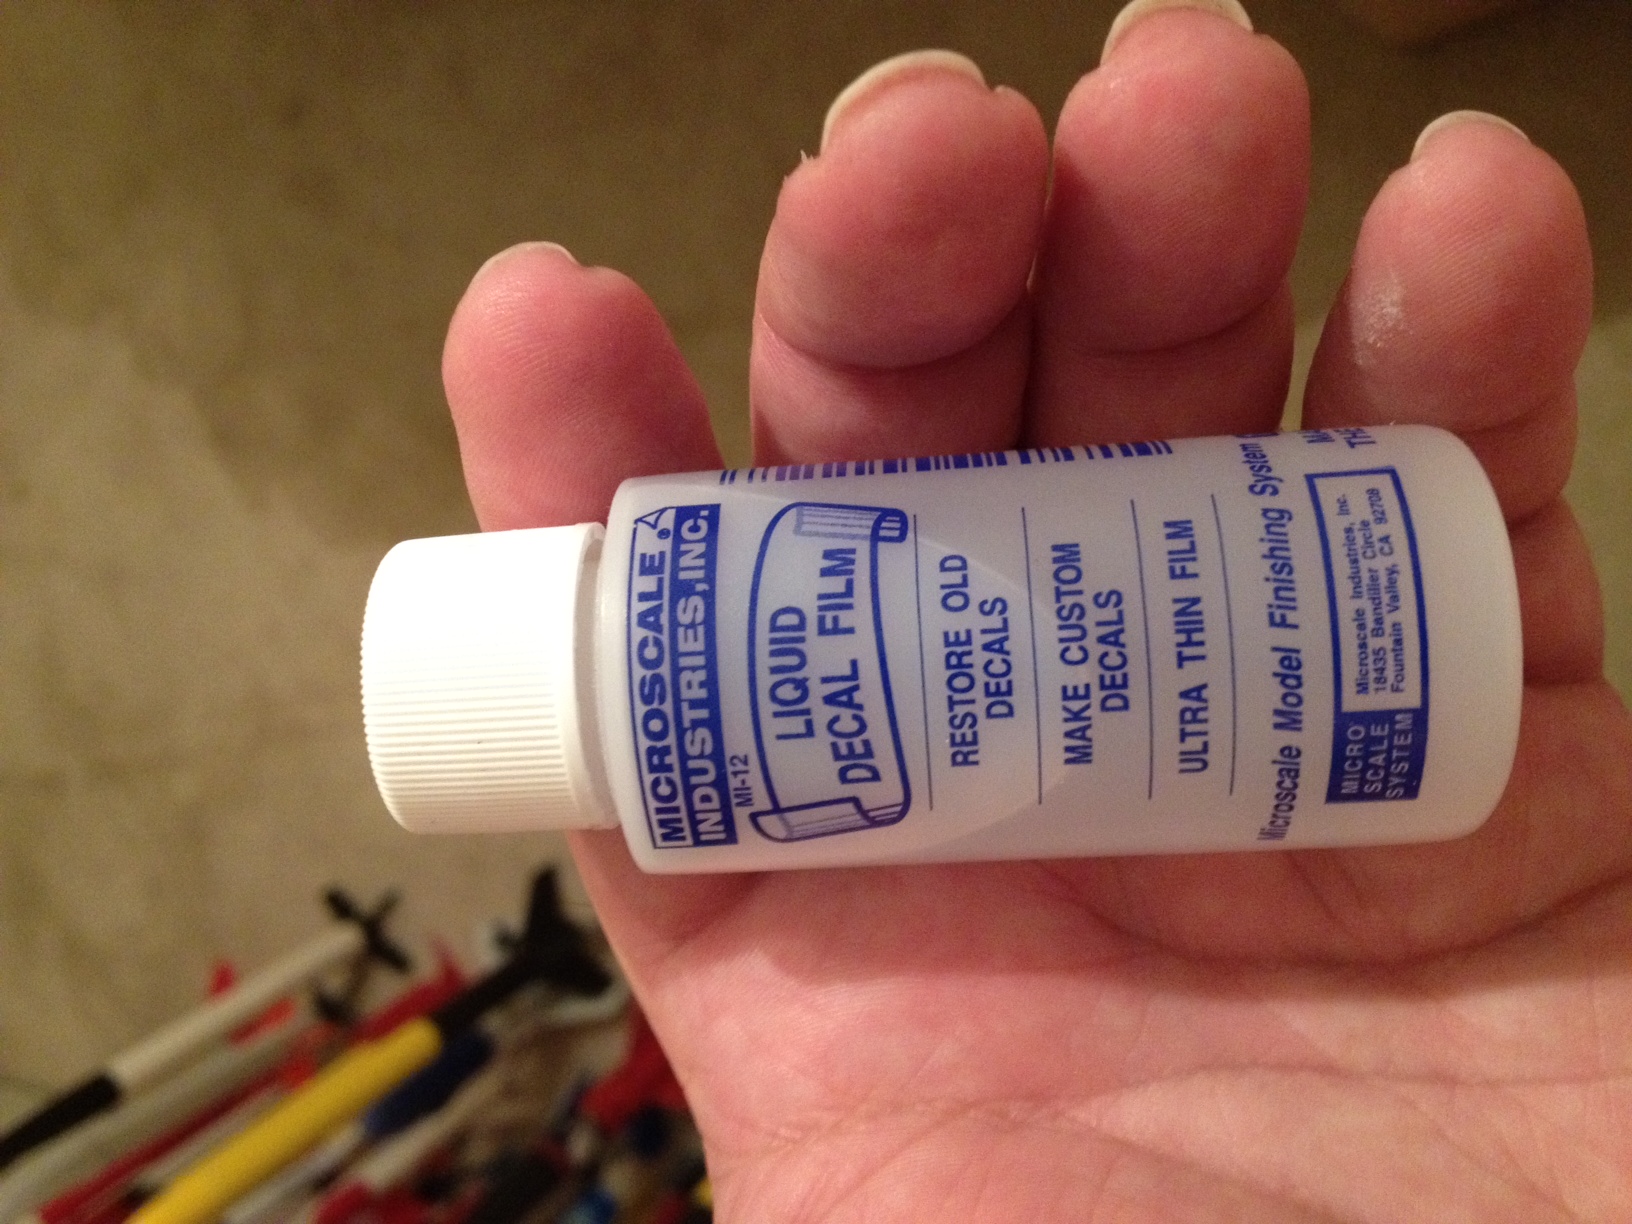
  • Thin decals, such as those from Excelsior, or old ones will require a coat or two of Microscale Liquid Decal Film before application. This stuff coats and thickens the decal, preventing tearing or shredding. You can buy it online or in real hobby shops like R.C. Hobbies. The pic above shows details on the bottle.
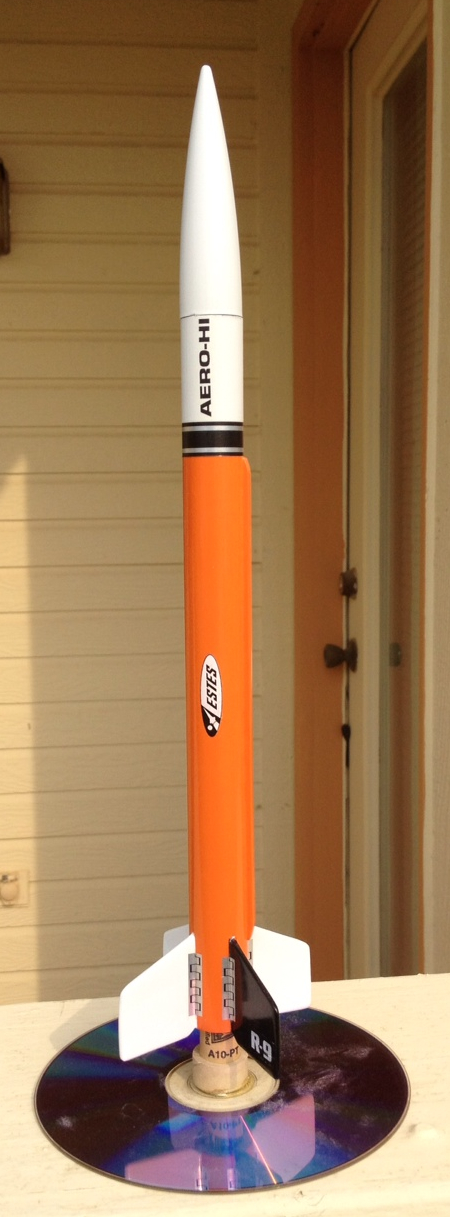
Here is a pic of the finished Aero-Hi:
Image
That’s all there is to it… Go forth and have fun building rockets!

Sunday, October 19, 2014

Rocket painting

Image
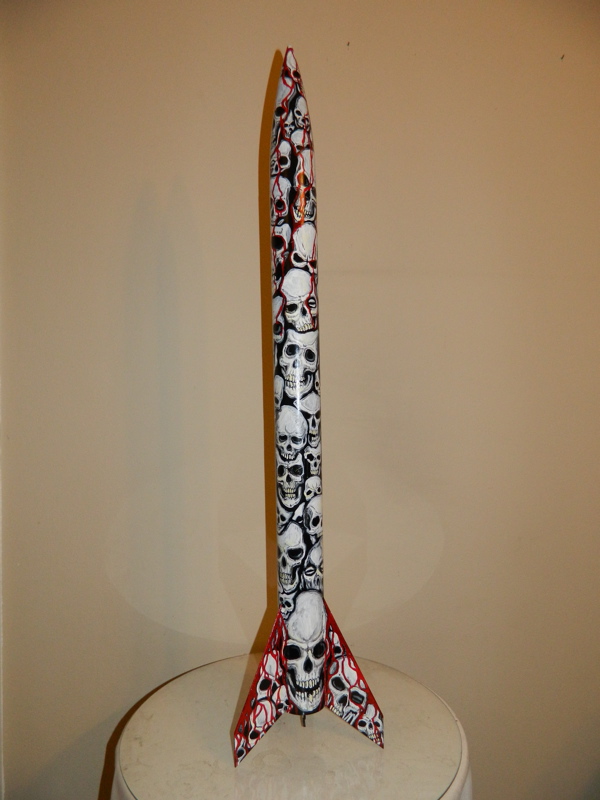
Estes Executioner built and painted by Kimble29
on Ye Olde Rocket Forum
Now that the primer has been applied, we can move on to the paint. The type of paint is the rocketeer’s choice, with many choosing Rustoleum spray, while others use the same Testors enamels used to paint model cars or planes. The more artistic among us will break out the air brush, producing magnificent finishes like that on the Executioner seen at right. Whatever your paint choice, be sure you read the directions on the can or bottle, and follow them – a lot of weeping and gnashing of teeth can be saved by knowing the drying and recoat time of your paint.
Also, it is important to avoid mixing paint brands or types, as this can lead to “crazing”, in which incompatibilities in the chemistry of the paints cause huge cracks and wrinkles in the finish. However, there may be times – usually due to the unavailability of a certain color – when you have to mix brands or types. In these cases, remember that enamels can be applied over lacquer-based paints such as Rustoleum or Krylon, but lacquers cannot be applied over enamels. Similarly, fluorescent paints should be the last coat, as they will craze any type of paint applied over them (I know this from bitter experience). When mixing different brands, such as Rustoleum and Krylon, the best thing to do is to test out the application on a unpainted scrap piece of body tube. Spray the paint on in the order you intend to use with the model, and see if there are any issues. If nothing materializes, you are good to go.
When working outdoors or in an open garage, be mindful of the wind and humidity. The wind part is obvious – you don’t want paint going everywhere and creating a spotty finish on the rocket. Avoid spraying when the humidity is higher than 50%, as this will lead to the paint dulling or “blushing” (areas where the paint appears duller than its surroundings). Here in the South, we have constant high humidity, but it usually drops below 50% between 2 and 4 in the afternoons, providing a couple of hours suitable for painting.
When painting, spray continous light coats down the entire rocket – don’t “spot paint”, as this will create an uneven finish (which means sanding) and don’t lay it on too thick, as this will cause the paint to run. With Krylon, I usually hold the spray can about 10 to 12 inches from the rocket; this same distance should be about right for Rustoleum and other sprays. Start with the lightest color first and then move on to successively darker colors, saving black for last – be sure to allow the right amount of drying time between coats! No matter what the paint scheme, I always apply a coat of gloss or semi-gloss white above the gray primer to serve as a base coat, as applying yellows or other light colors directly on top of the primer results in very dark versions of these colors. White is always a good place to start.
As I mentioned in an earlier post, I use Tamiya masking type to mask off areas of the rocket when painting. You can avoid bleeds and smudges by
  • Burnish down the edges of the tape with your finger – make sure the rocket surface is smooth and that the tape has good contact, else you will get bleeds.
  • It is a good idea to apply another light coat of the prior color, as this will create a “seal” on the tape edge, also avoiding bleeds. If you use Scotch tape for masking, this is a must.
  • Be SURE you have covered/masked the areas of the rocket that are not supposed to receive the paint – you would be surprised to find how easily that fin color can find a way to get on to your nice white body tube. Black is particularly evil in doing this.
  • Remove the masking tape as soon as the paint can be touched – if you wait until it is fully dry, you run the risk of the paint chipping when you remove the tape. Pull the tape straight up when removing it.
  • Use 1000/2000 grit sandpaper to smooth out rough areas and imperfections between coats.
  • Above all, be patient! Wait for the right conditions and take your time.
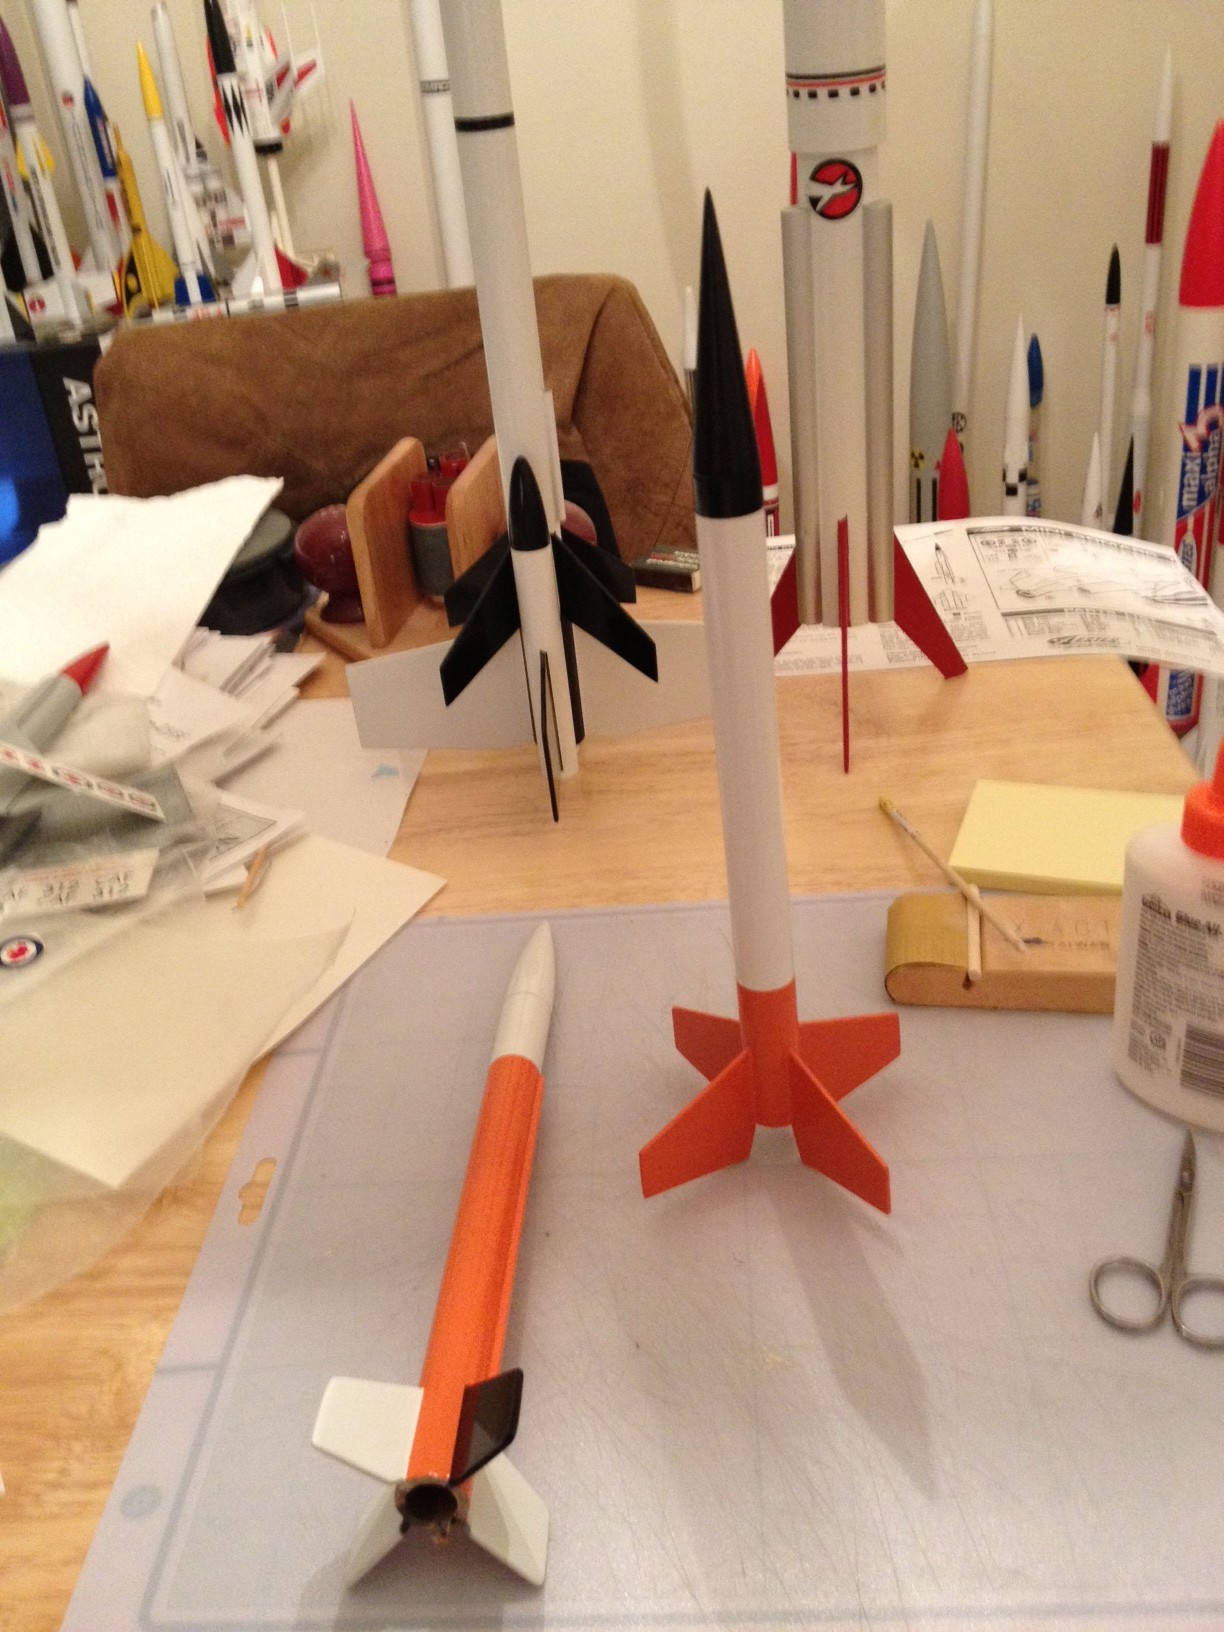
Here are the Rogue and Aero-Hi after painting – note the nice sharp lines. I am reasonably pleased with how these turned out, so we are now ready for the final step – applying the decals.

Monday, October 13, 2014

Rocket finishing - where most of the sanding happens

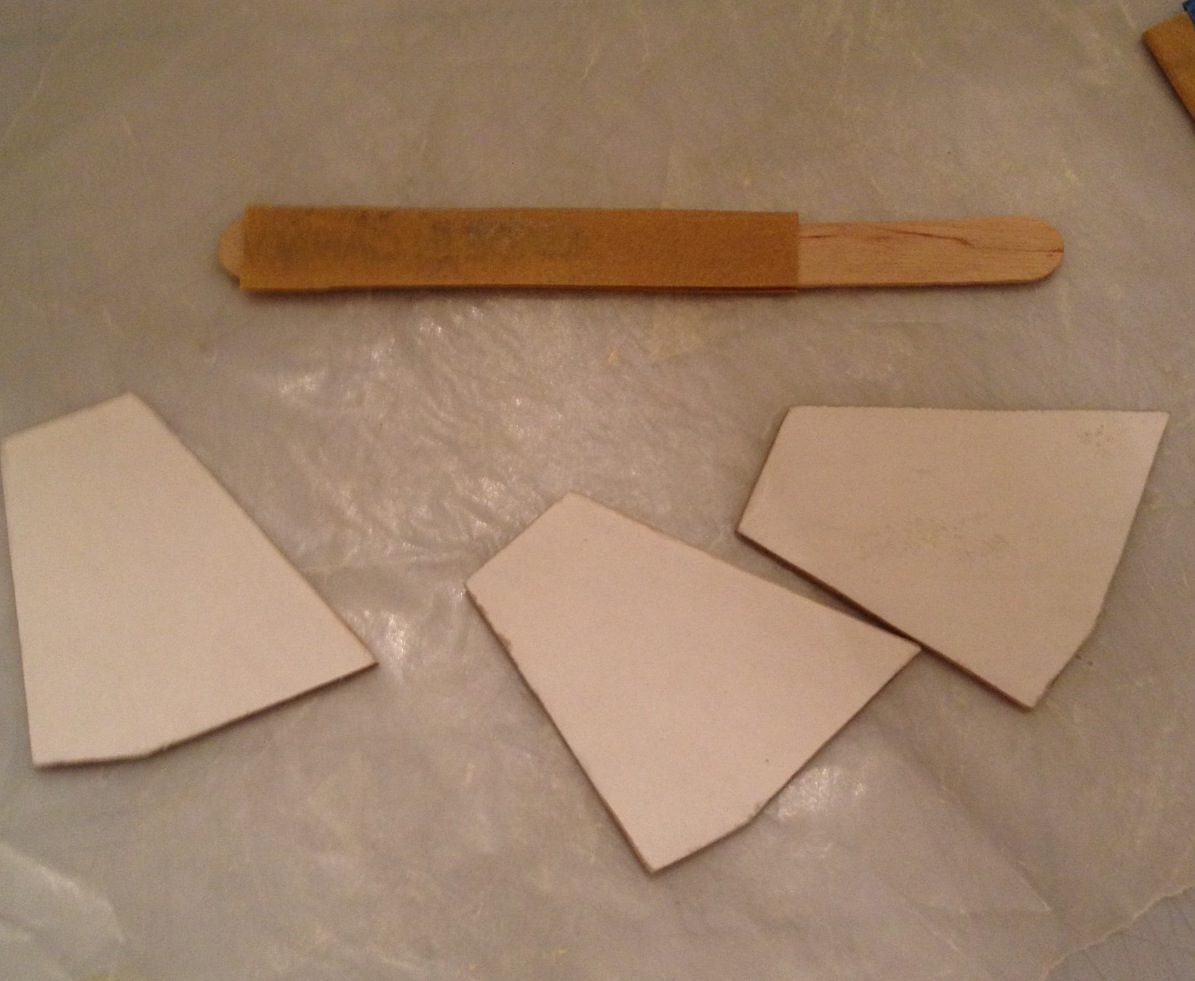
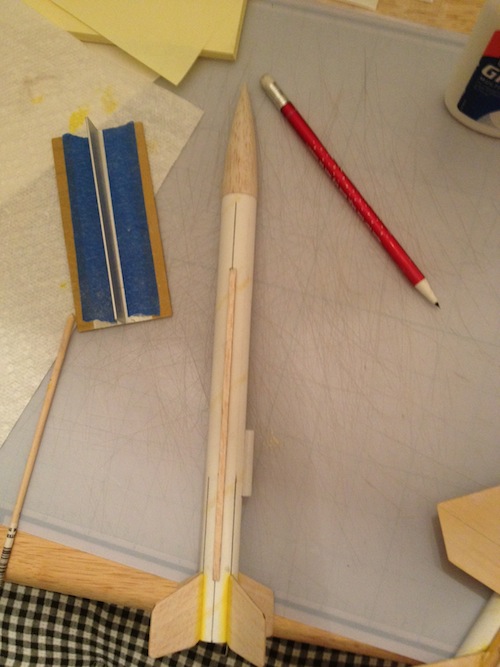
Here are 3 of the laminated fins for the Rogue before attachment. This picture is important, not so much due to the fins, but because of the makeshift tool just above them. Consisting of a strip of 400 grit sandpaper glued to a popsicle stick, it is very useful for sanding those small or hard-to-get-at areas of the rocket – in this case, the edges of the Rogue fins. You will often find yourself constructing such tools as you move on to harder, more elaborate builds or HPR; for example, I know quite a few rocketeers who glue sandpaper strips to dowels to help them sand smooth epoxy filets.
The Rogue fins and launch lug were attached to the rocket and filleted, just like the Aero Hi. After the glue dried, I applied sanding sealer to the balsa parts of both rockets to fill the balsa grain. There are a lot of different ways to do this, but no matter which mehod you choose, it will involve multiple coats and a fair amount of sanding. My technique is as follows:
  1. Go outside on the patio, or open the sliding glass doors to the work room. Aerogloss sanding sealer produces a lot of fumes, so you want to work in a well-ventilated area.
  2. Using the appropriate size brush (big for big fins, small for conduits, etc), apply a coat of sanding sealer. Wait 15 minutes then apply a second coat.
  3. Wait 45 minutes, sand with 320 grit sandpaper.
  4. Repeat step 2.
  5. Wait 45 minutes, sand with 400 grit sandpaper.
If you have sanded the sides of your fins before cutting or removing them from the balsa sheet, you should have a nice, glassy-smooth surface.  If not, apply another coat of sanding sealer, wait 45 minutes, and sand with 400 grit. Repeat until the grain is filled and the surface is smooth. Unless the balsa grain is deep, I usually find 4 coats is enough for fins; nose cones usually take 5.
After the sealer has dried overnight, you can then prime the rocket. Choice of primer varies from rocketeer to rocketeer – I use Krylon Industrial, again because it is forgiving, but others swear by Rustoleum, Valspar, or even Walmart brand (cheap, but it works). Some even try fill the grain and prime in one step by using Kilz sealer-primer. I tried this stuff once, when I built my Thrustline D-Region Tomahawk – it turned out to be Chuck Pierce’s worst nightmare, taking me 2 days to sand out all the bubbles to get a smooth finish. Plus, you could have probably buried me in all the dust that was produced.
Anyway, apply a coat of primer to the rocket, wait a few hours or a day or so (depending on drying time), and sand most of it off with 240/320 grit sandpaper. The pic below shows the bottom part of Rogue after this has been done.
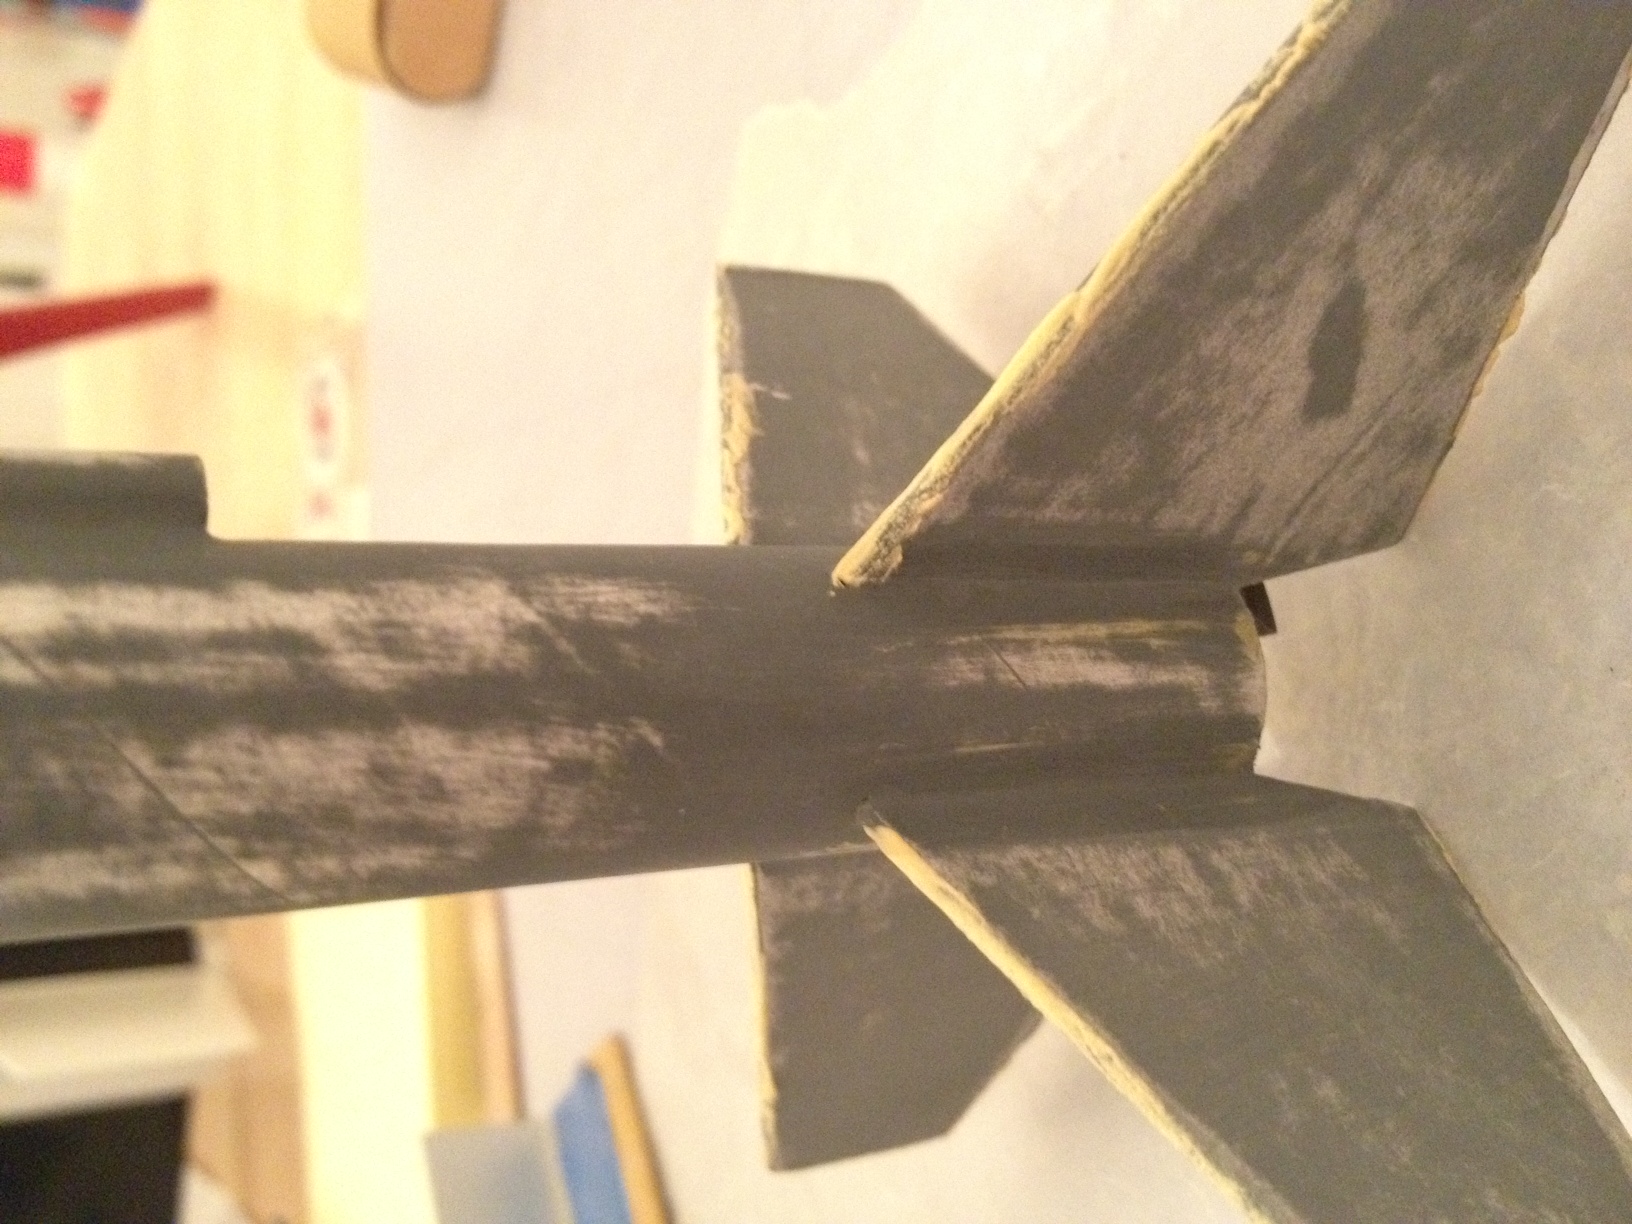
The primer not only helps prepare the rocket for the paint, it also shows any imperfections in the finish – nicks, especially deep grain, scratches, uneven fillets, and so forth – enabling you to take corrective steps. For uneven fillets, I usually add another layer of glue, smoothing it out with a damp finger. Balsa nicks and scratches, as well as many other things, are usually fixed by applying thinned Fill N Finish to the area. This Elmer’s product is indispensable in producing good looking mod rocs, so be sure you go out and buy some. In the pic above, you can see where I have applied Fill N Finish to the non-papered edges of the Rogue fins to cover the cracks and imperfections. I am also building the BMS Mini Bomarc, which is shown below. Note that I have used Fill N Finish to fix nicks and scratches in the balsa wings, as well as an edge defect at the bottom of the right wing.
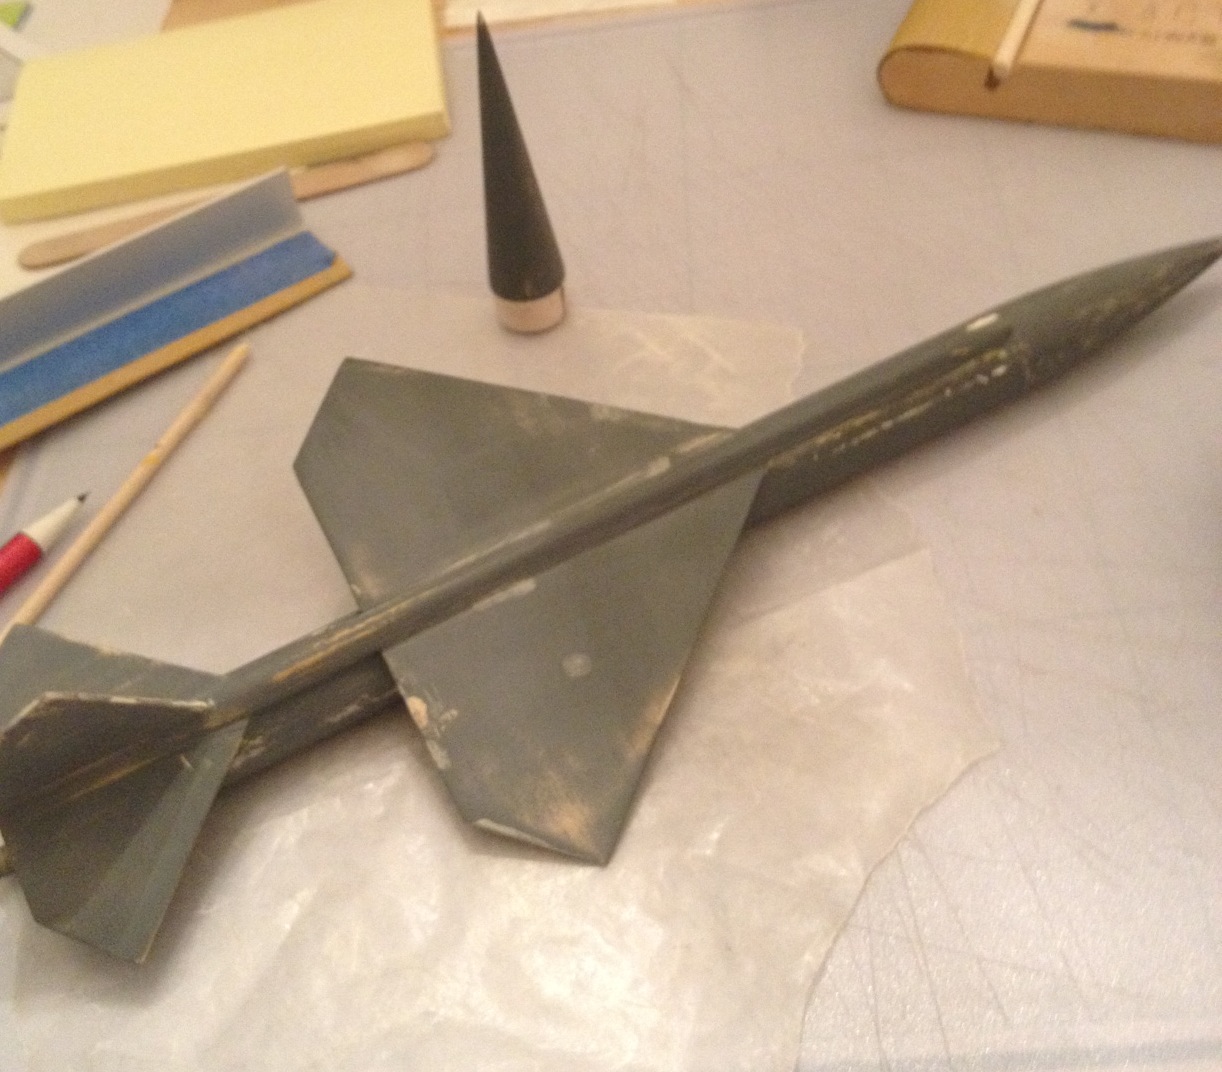
After fixing the imperfections (be sure to sand the Fill N Finish smooth), apply a second coat of primer, let dry, and sand with 400 grit. The rocket should now feel as smooth as a baby’s bottom; if not, you have more priming and sanding to do (more the latter I’m afraid).

Wednesday, October 8, 2014

Putting things together...

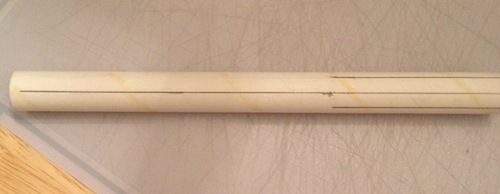
After assembling the motor mounts, the next step is to mark the body tubes for the fins and launch lugs. The Estes marking guides make this easy – once you’ve decided which end of the body tube is the bottom :)
The v-shaped plastic widget is then used to draw the lines on the tubes:
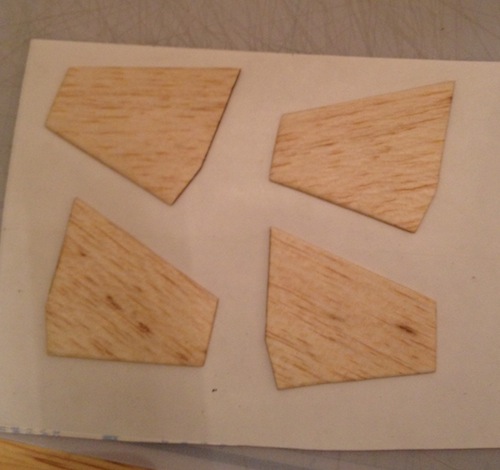
Before I started attaching the fins to the Aero-Hi tube, I pulled out my box of Avery full sheet labels to start laminating the Rogue fins. Once again, this is simple – cut the sheet to size and press the fins down on the label paper, making sure there are no bubbles. I then placed a sheet of wax paper over the fins and let them sit under a stack of books overnight to make sure the adhesive ‘sticks’ well. Then trace around the fin with a sharp hobby knife and repeat for the other side.
Fin attachment is one of the hardest parts of rocket building for newbies (It sure was for my 10 year old self) – it needn’t be. All you have to do is to remember to use the ‘double glue’ technique, which is spelled out in the Handbook of Model Rocketry:
…when gluing porous materials such as paper or wood you coat both surfaces with a layer of glue or bonding agent and let both surfaces dry. Then coat both surfaces again and join them together. The first coat of glue on both surfaces penetrates the pores of the material. The second glue coat is then free to join with the first coat and with the second coat on the other surface. A double glue joint will be so strong that the materials will break or tear before the glue joint turns loose.
If you follow the above, you will find that the fin will grab the body tube almost instantly with the second coat, eliminating the frustrating “the darn fin fell off” situation. The strength part is also correct; I have had fins break, but never come loose from the body tube since I have used double glue joints.
It is now pretty easy to attach the fins, launch lug, and simulated conduit to the Aero-Hi:
After letting the fins dry overnight, I applied fillets of wood glue. Wood glue shrinks (as does white glue), so I use my finger to apply 3 successive glue layers to make the fillet, allowing a little time to dry between layers. This results in very nice and smooth fillets. I then did the same for the launch lug.

Saturday, October 4, 2014

A blustery launch...

Today was HARA's last high power launch of the season - the Manchester field usually closes for re-sodding in October, so we had one final chance to put up some big rockets before flights resume in late winter (March). Duane and I made the trek up there in an SUV full of rockets - I had 7, including the the Bullpup 1 and my recently finished Viking 7, and Duane had a nice green HPR rocket, along with a Cherokee-D. I also had my trusty new iPhone in my pocket, eager to pit its superior photo/video capabilities against my complete lack of skill in imagery. The iPhone did not disappoint; however, the weather did.

To say that it was windy would be an understatement - the winds were around 10-20 mph out of the northeast all day, right at the legal flying limit (safety code restricts us to winds of 20 mph or less). Not only were folding chairs, flight cards, and small boxes being blown around on the ground, but the rockets were also pushed to the west almost as fast as they left the pad. A few ended up in the western treeline (which was a decent distance away) including a beautiful level 1 certification attempt (apogee parachute deployment) and a level 2 rocket loaded with expensive tracking hardware. It is currently hanging about 100 feet up, continuously transmitting its location to anyone listening on the right frequency.

Nonetheless, I opted to fly a couple of rockets - I spent 3 hours last night prepping 7 rockets for today, and I was NOT leaving the field without flying something. First up was the SAI Hen Grenade, making its debut on an Estes B6-4. Good altitude, and it landed in the parking area. I followed with my Semroc Micron on an A6-4. Decent altitude, but the little devil drifted about twice as far as the Hen Grenade, despite using a small streamer as a recovery device. That was enough to convince me that it was time to stop while I was ahead. I had flown 2 rockets and got them back; I doubted that the rocket gods were going to permit that streak to continue.

SAI Hen Grenade clone heads skyward on an Estes B6-4 (click to enlarge).
One of the more interesting launches of the day was that of a Scout owned by fellow HARA member Art Woodling. Built in 1968, this 46 year-old model rocket took to the sky on an Estes A8-5, but had its trajectory curved by the wind almost as soon as it left the launch rod. Being small, Scouts can be hard to track, and I lost sight of this one. After about 20 minutes of searching, it was found in the tall grass just north of the parking lot, which was a relief. Would not want to loose a venerable classic like that!

Art Woodling's 1968 Estes Scout begins its arcing trajectory (click to enlarge).
The new iPhone performed great - the burst mode of its camera is simple to use, and I managed to repeatedly get 4 or 5 shots of a rocket leaving the pad before it exited the camera field of view (as you can see from the above). Very awesome! It can also shoot 240 fps second video, and I captured a few clips of high power launches in this mode. The first video below is that of a Madcow Arcas leaving the pad on an H motor, and the second is the launch of Daniel Cavender's Pegasus on a K motor. It was the last flight of the day, and an excellent way to close out the 2014 flying season.

(Be sure you select HD in the settings when viewing the below videos)


Duane (who had wisely decided to fly none of his rockets) and I loaded up around 3 PM and headed back to Huntsville, stopping along the way to have some BBQ at Larry's BBQ in Winchester (if it has a pig out front, it is probably good eating). Two rockets flown, none lost, and some nice pictures - not a bad tally for a very blustery day.