Sunday, November 30, 2014

Tiny altimeters

The progress in modern electronics never ceases to amaze me - I always thought that the Perfectflite PNUT - a scant 0.7 x 3" in dimensions - was small, especially given the wealth of data it provides. However, there are some very nice small altimeters that don't connect to a computer's USB port. Perhaps the most famous of these is the Jolly Logic Altimeter 2, which not only will measure the peak altitude of the rocket, but will also give a host of other information like engine burn time, max acceleration and speed, coast time, time from apogee to ejection, and so forth. It's a really nice product, and the company president, John Beans, stands behind his work. I am very much looking forward to his Altimeter 3, which will transmit data via bluetooth to a smartphone. How cool is that?


My latest acquisition is Perfectflite's latest product - the Firefly. This very tiny altimeter is only 1 inch long by 0.7 inches wide, and weighs a scant 0.12 ounces with the battery. Unlike other Perfectflite altimeters, it gives the peak altitude and speed via a series of blinks of an LED, rather than a sequence of beeps. I can't wait to try this puppy out - it should fit in almost any rocket!


Plus, at only $25, the price won't seriously hurt the wallet.

Thursday, October 30, 2014

The list...

The official HARA flying season ends in October... While there may be small personal launches here and there, November through February is what we rocketeers call the "build season", in which one replenishes supplies and gets new and old rockets ready for the start of the flying season in March. High power rocketeers will usually have some big "winter project" - a ginormous vehicle that sucks up many man hours to wow the crowds at the Spring launches. Us low power folks have what we call "The List" - a list of rockets we intend to build and finish over the cold winter months. Every year, I carefully make one of these... And every year, my rocket ADD renders it worthless by December. This time I have sworn to stick to it - which is also the same promise I have made in past years. Hopefully this year will see a breakthrough.

So dear readers, here is "The List" for this winter:

  • Big Bertha - No brainer. No fleet is complete without a Bertha, and mine was put out of commission at the Rocket City Blast Off.
  • Beulah - A Big Bertha derivative, featuring a two motor cluster. Inspired by Chris Michielssen's Big Girtha.
  • S.S. Cestris by Sirius Rocketry - Been wanting to build this kit for some time.
  • Estes Gyroc clone - Always wanted to build one of these "Helicopter recovery" rockets. A classic.
  • SpaceX Falcon 9
  • Estes Scrambler clone - The quintessential egg lofter. never had one of these as a youngster, though I really, really wanted one.
  • Tiny Tim scale model - Have the parts, have the design, time to get this puppy built.


Tiny Tim air to ground rocket (Click to enlarge).

This will keep me busy for a bit. And if I know me, there will be some other rockets built this winter :)

Saturday, October 25, 2014

The Rocket City Blastoff

Last Saturday saw the revival of the Rocket City Blast Off, an annual launch HARA used to host back in the 1980's and 90's. Held at the Old Airport (now John Hunt Park) in Huntsville, the RCBO provided an opportunity for residents of Huntsville to come out and fly rockets without having to look for a field or worry about setting up launch pads. HARA provides the range, complete with launch pads for rockets up to G motor impulse and the appropriate folks to assist in helping people get their birds up in the air. I was the unofficial organizer of this year's launch, and was lucky to get lot of good support from the club and the local chapter of the American Institute of Aeronautics and Astronautics (AIAA). The latter was terrific at generating publicity and also managed to get a couple of interesting exhibits, such as suitcase rocket motor demonstrations.

Rocket City Blast Off banner (taken as we were breaking down the range).

Even though I was very busy in the first 3 hours of the launch (which lasted from 10 AM to 3 PM), I did manage to fly 5 rockets:

  • Estes Porta Pot Shot - The flying porta potty produced a fairly nice flight on a C6-3. Launding on the defunct runway asphalt was a bit rough, but no damage.
  • Estes Spirit - One of the new ARTF (almost ready to fly) kits, this patriotic rocket flew on a B6-4. Landed in the grass under a fully deployed parachute.

My Spirit leaves the pad on a B6-4 (click to enlarge).

  • Estes Red Max - This battered veteran took to the air once again on a B6-4. Nice soft landing on the grass.
  • Estes Snitch - Nothing but a C motor in this flying saucer - it's very draggy. The C6-0 took it to maybe 100 feet before it fell to the asphalt.
  • Estes Big Bertha clone - This was the last flight for this 10 year old bird. Launched on a C6-3, it took my keychain camera up to about 250 feet or so; unfortunately, the parachute did not deploy, resulting in the body folding up like an accordion when the rocket slammed into the pavement. The camera survived, but the rocket is not worth repairing - in addition to the crumpled body tube, the motor mount was also shoved forward into what's left of the body tube. The flight video is below - as you can tell, the landing was a bit rough :/


Despite the loss of the Bertha, it was a very, very good launch. There were over 120 flights, many made by a bunch of cub scouts who came out to fly their just-built rockets. A lot of fun was had by all, and we agreed that we must have an RCBO in the coming year. I hope it becomes an annual event, just like its predecessor. It would be a nice way to end the flying season of each year!

Only real problems with John Hunt Park are the numerous power lines
leading to the fields and facilities. The RCBO saw only one victim; unfortunately
it was a very nice Estes AMRAAM (click to enlarge).


Wednesday, October 22, 2014

Building Rockets, Finale – Decals

A lot of the new rockets come with “peel ‘n stick” stickers these days, rather than decals. Many rocketeers call these “peel ‘n cuss”, because they are not much fun to apply (especially roll patterns and long names) due to their stickiness – very little room to make a mistake. They are also pretty thick and often show bubbles and other raised areas. As a result, many of us will scan the stickers and either print them out on decal paper or get Excelsior or Tango Papa to do this for us. Regular decals are nice – they are thin, adhere well to the rocket without unsightly bubbles and blemishes, and are generally very forgiving when it comes to placement.
Applying decals is more than sink in water for a few seconds, then stick on rocket. Here are a few tips I have learned over the years:
  • Wait a few days after painting before applying decals. This gives the paint time to thoroughly dry and outgas. A good rule of thumb is “if you can smell the paint, don’t apply the decals.”
  • Be sure you have a small clean rag to wipe away water and smooth out bubbles on the decal.
  • Submerse the decal in warm water for 30 seconds or so. Some rocketeers – like me – also add a drop of dish soap to the water, claiming that it helps the decals slide off the backing easier. Be sure the water stays warm; if you have a fair number of decals to apply, you may have to change it a few times.
  • Wet the area of the rocket that will receive the decal before you apply it – this will allow you to position and move the decal around until you have it just right.
  • Thin decals, such as those from Excelsior, or old ones will require a coat or two of Microscale Liquid Decal Film before application. This stuff coats and thickens the decal, preventing tearing or shredding. You can buy it online or in real hobby shops like R.C. Hobbies. The pic above shows details on the bottle.
Here is a pic of the finished Aero-Hi:
Image
That’s all there is to it… Go forth and have fun building rockets!

Sunday, October 19, 2014

Rocket painting

Image
Estes Executioner built and painted by Kimble29
on Ye Olde Rocket Forum
Now that the primer has been applied, we can move on to the paint. The type of paint is the rocketeer’s choice, with many choosing Rustoleum spray, while others use the same Testors enamels used to paint model cars or planes. The more artistic among us will break out the air brush, producing magnificent finishes like that on the Executioner seen at right. Whatever your paint choice, be sure you read the directions on the can or bottle, and follow them – a lot of weeping and gnashing of teeth can be saved by knowing the drying and recoat time of your paint.
Also, it is important to avoid mixing paint brands or types, as this can lead to “crazing”, in which incompatibilities in the chemistry of the paints cause huge cracks and wrinkles in the finish. However, there may be times – usually due to the unavailability of a certain color – when you have to mix brands or types. In these cases, remember that enamels can be applied over lacquer-based paints such as Rustoleum or Krylon, but lacquers cannot be applied over enamels. Similarly, fluorescent paints should be the last coat, as they will craze any type of paint applied over them (I know this from bitter experience). When mixing different brands, such as Rustoleum and Krylon, the best thing to do is to test out the application on a unpainted scrap piece of body tube. Spray the paint on in the order you intend to use with the model, and see if there are any issues. If nothing materializes, you are good to go.
When working outdoors or in an open garage, be mindful of the wind and humidity. The wind part is obvious – you don’t want paint going everywhere and creating a spotty finish on the rocket. Avoid spraying when the humidity is higher than 50%, as this will lead to the paint dulling or “blushing” (areas where the paint appears duller than its surroundings). Here in the South, we have constant high humidity, but it usually drops below 50% between 2 and 4 in the afternoons, providing a couple of hours suitable for painting.
When painting, spray continous light coats down the entire rocket – don’t “spot paint”, as this will create an uneven finish (which means sanding) and don’t lay it on too thick, as this will cause the paint to run. With Krylon, I usually hold the spray can about 10 to 12 inches from the rocket; this same distance should be about right for Rustoleum and other sprays. Start with the lightest color first and then move on to successively darker colors, saving black for last – be sure to allow the right amount of drying time between coats! No matter what the paint scheme, I always apply a coat of gloss or semi-gloss white above the gray primer to serve as a base coat, as applying yellows or other light colors directly on top of the primer results in very dark versions of these colors. White is always a good place to start.
As I mentioned in an earlier post, I use Tamiya masking type to mask off areas of the rocket when painting. You can avoid bleeds and smudges by
  • Burnish down the edges of the tape with your finger – make sure the rocket surface is smooth and that the tape has good contact, else you will get bleeds.
  • It is a good idea to apply another light coat of the prior color, as this will create a “seal” on the tape edge, also avoiding bleeds. If you use Scotch tape for masking, this is a must.
  • Be SURE you have covered/masked the areas of the rocket that are not supposed to receive the paint – you would be surprised to find how easily that fin color can find a way to get on to your nice white body tube. Black is particularly evil in doing this.
  • Remove the masking tape as soon as the paint can be touched – if you wait until it is fully dry, you run the risk of the paint chipping when you remove the tape. Pull the tape straight up when removing it.
  • Use 1000/2000 grit sandpaper to smooth out rough areas and imperfections between coats.
  • Above all, be patient! Wait for the right conditions and take your time.
Here are the Rogue and Aero-Hi after painting – note the nice sharp lines. I am reasonably pleased with how these turned out, so we are now ready for the final step – applying the decals.

Monday, October 13, 2014

Rocket finishing - where most of the sanding happens

Here are 3 of the laminated fins for the Rogue before attachment. This picture is important, not so much due to the fins, but because of the makeshift tool just above them. Consisting of a strip of 400 grit sandpaper glued to a popsicle stick, it is very useful for sanding those small or hard-to-get-at areas of the rocket – in this case, the edges of the Rogue fins. You will often find yourself constructing such tools as you move on to harder, more elaborate builds or HPR; for example, I know quite a few rocketeers who glue sandpaper strips to dowels to help them sand smooth epoxy filets.
The Rogue fins and launch lug were attached to the rocket and filleted, just like the Aero Hi. After the glue dried, I applied sanding sealer to the balsa parts of both rockets to fill the balsa grain. There are a lot of different ways to do this, but no matter which mehod you choose, it will involve multiple coats and a fair amount of sanding. My technique is as follows:
  1. Go outside on the patio, or open the sliding glass doors to the work room. Aerogloss sanding sealer produces a lot of fumes, so you want to work in a well-ventilated area.
  2. Using the appropriate size brush (big for big fins, small for conduits, etc), apply a coat of sanding sealer. Wait 15 minutes then apply a second coat.
  3. Wait 45 minutes, sand with 320 grit sandpaper.
  4. Repeat step 2.
  5. Wait 45 minutes, sand with 400 grit sandpaper.
If you have sanded the sides of your fins before cutting or removing them from the balsa sheet, you should have a nice, glassy-smooth surface.  If not, apply another coat of sanding sealer, wait 45 minutes, and sand with 400 grit. Repeat until the grain is filled and the surface is smooth. Unless the balsa grain is deep, I usually find 4 coats is enough for fins; nose cones usually take 5.
After the sealer has dried overnight, you can then prime the rocket. Choice of primer varies from rocketeer to rocketeer – I use Krylon Industrial, again because it is forgiving, but others swear by Rustoleum, Valspar, or even Walmart brand (cheap, but it works). Some even try fill the grain and prime in one step by using Kilz sealer-primer. I tried this stuff once, when I built my Thrustline D-Region Tomahawk – it turned out to be Chuck Pierce’s worst nightmare, taking me 2 days to sand out all the bubbles to get a smooth finish. Plus, you could have probably buried me in all the dust that was produced.
Anyway, apply a coat of primer to the rocket, wait a few hours or a day or so (depending on drying time), and sand most of it off with 240/320 grit sandpaper. The pic below shows the bottom part of Rogue after this has been done.
The primer not only helps prepare the rocket for the paint, it also shows any imperfections in the finish – nicks, especially deep grain, scratches, uneven fillets, and so forth – enabling you to take corrective steps. For uneven fillets, I usually add another layer of glue, smoothing it out with a damp finger. Balsa nicks and scratches, as well as many other things, are usually fixed by applying thinned Fill N Finish to the area. This Elmer’s product is indispensable in producing good looking mod rocs, so be sure you go out and buy some. In the pic above, you can see where I have applied Fill N Finish to the non-papered edges of the Rogue fins to cover the cracks and imperfections. I am also building the BMS Mini Bomarc, which is shown below. Note that I have used Fill N Finish to fix nicks and scratches in the balsa wings, as well as an edge defect at the bottom of the right wing.
After fixing the imperfections (be sure to sand the Fill N Finish smooth), apply a second coat of primer, let dry, and sand with 400 grit. The rocket should now feel as smooth as a baby’s bottom; if not, you have more priming and sanding to do (more the latter I’m afraid).

Wednesday, October 8, 2014

Putting things together...

After assembling the motor mounts, the next step is to mark the body tubes for the fins and launch lugs. The Estes marking guides make this easy – once you’ve decided which end of the body tube is the bottom :)
The v-shaped plastic widget is then used to draw the lines on the tubes:
Before I started attaching the fins to the Aero-Hi tube, I pulled out my box of Avery full sheet labels to start laminating the Rogue fins. Once again, this is simple – cut the sheet to size and press the fins down on the label paper, making sure there are no bubbles. I then placed a sheet of wax paper over the fins and let them sit under a stack of books overnight to make sure the adhesive ‘sticks’ well. Then trace around the fin with a sharp hobby knife and repeat for the other side.
Fin attachment is one of the hardest parts of rocket building for newbies (It sure was for my 10 year old self) – it needn’t be. All you have to do is to remember to use the ‘double glue’ technique, which is spelled out in the Handbook of Model Rocketry:
…when gluing porous materials such as paper or wood you coat both surfaces with a layer of glue or bonding agent and let both surfaces dry. Then coat both surfaces again and join them together. The first coat of glue on both surfaces penetrates the pores of the material. The second glue coat is then free to join with the first coat and with the second coat on the other surface. A double glue joint will be so strong that the materials will break or tear before the glue joint turns loose.
If you follow the above, you will find that the fin will grab the body tube almost instantly with the second coat, eliminating the frustrating “the darn fin fell off” situation. The strength part is also correct; I have had fins break, but never come loose from the body tube since I have used double glue joints.
It is now pretty easy to attach the fins, launch lug, and simulated conduit to the Aero-Hi:
After letting the fins dry overnight, I applied fillets of wood glue. Wood glue shrinks (as does white glue), so I use my finger to apply 3 successive glue layers to make the fillet, allowing a little time to dry between layers. This results in very nice and smooth fillets. I then did the same for the launch lug.

Saturday, October 4, 2014

A blustery launch...

Today was HARA's last high power launch of the season - the Manchester field usually closes for re-sodding in October, so we had one final chance to put up some big rockets before flights resume in late winter (March). Duane and I made the trek up there in an SUV full of rockets - I had 7, including the the Bullpup 1 and my recently finished Viking 7, and Duane had a nice green HPR rocket, along with a Cherokee-D. I also had my trusty new iPhone in my pocket, eager to pit its superior photo/video capabilities against my complete lack of skill in imagery. The iPhone did not disappoint; however, the weather did.

To say that it was windy would be an understatement - the winds were around 10-20 mph out of the northeast all day, right at the legal flying limit (safety code restricts us to winds of 20 mph or less). Not only were folding chairs, flight cards, and small boxes being blown around on the ground, but the rockets were also pushed to the west almost as fast as they left the pad. A few ended up in the western treeline (which was a decent distance away) including a beautiful level 1 certification attempt (apogee parachute deployment) and a level 2 rocket loaded with expensive tracking hardware. It is currently hanging about 100 feet up, continuously transmitting its location to anyone listening on the right frequency.

Nonetheless, I opted to fly a couple of rockets - I spent 3 hours last night prepping 7 rockets for today, and I was NOT leaving the field without flying something. First up was the SAI Hen Grenade, making its debut on an Estes B6-4. Good altitude, and it landed in the parking area. I followed with my Semroc Micron on an A6-4. Decent altitude, but the little devil drifted about twice as far as the Hen Grenade, despite using a small streamer as a recovery device. That was enough to convince me that it was time to stop while I was ahead. I had flown 2 rockets and got them back; I doubted that the rocket gods were going to permit that streak to continue.

SAI Hen Grenade clone heads skyward on an Estes B6-4 (click to enlarge).
One of the more interesting launches of the day was that of a Scout owned by fellow HARA member Art Woodling. Built in 1968, this 46 year-old model rocket took to the sky on an Estes A8-5, but had its trajectory curved by the wind almost as soon as it left the launch rod. Being small, Scouts can be hard to track, and I lost sight of this one. After about 20 minutes of searching, it was found in the tall grass just north of the parking lot, which was a relief. Would not want to loose a venerable classic like that!

Art Woodling's 1968 Estes Scout begins its arcing trajectory (click to enlarge).
The new iPhone performed great - the burst mode of its camera is simple to use, and I managed to repeatedly get 4 or 5 shots of a rocket leaving the pad before it exited the camera field of view (as you can see from the above). Very awesome! It can also shoot 240 fps second video, and I captured a few clips of high power launches in this mode. The first video below is that of a Madcow Arcas leaving the pad on an H motor, and the second is the launch of Daniel Cavender's Pegasus on a K motor. It was the last flight of the day, and an excellent way to close out the 2014 flying season.

(Be sure you select HD in the settings when viewing the below videos)


Duane (who had wisely decided to fly none of his rockets) and I loaded up around 3 PM and headed back to Huntsville, stopping along the way to have some BBQ at Larry's BBQ in Winchester (if it has a pig out front, it is probably good eating). Two rockets flown, none lost, and some nice pictures - not a bad tally for a very blustery day.

Tuesday, September 30, 2014

Starting a rocket build

While I very much enjoy building current kits, my real passion is perusing old catalogs and plans so that I can build the rockets that were available when I was a young geek (40 or so years ago – sigh). You can find a lot of the old catalogs here on Ninfinger’s site, and the instructions/plans are often available at JimZ’s Rocket Plans or, if he doesn’t have them, Ye Olde Rocket Plans. What you DO NOT want to do (unless you are a collector with serious bucks) is to spend a couple of hundred dollars on eBay for a kit you can easily clone for about $15.
A while ago, I was looking at the Estes 1973 catalog and ran across this page:
I have cloned the two in the middle (Little John and Wolverine) already, and the two on the far left – the Aero-Hi and Rogue – struck my fancy. I especially like the sounding rocket style and color scheme on the Aero-Hi. I now had the idea for my next build project, so what came next? In this case, I invoked Rule 1 from Part 1 of this series, and think about the build:
  1. Are the instructions and parts list available? Yep – JimZ’s site has the plans for the Rogue and Ye Olde Rocket Plans has them for the Aero-Hi.
  2. Are the parts available? Again, yes. Go to the Semroc web site – my absolute favorite rocket vendor, btw – and click on The Classics image near the top right. Searching the list for the Aero-Hi and Rogue shows that Semroc has all the parts I need, including laser-cut fin sets (Yay!). No decals, but a quick check of the Excelsior Rocketry web site indicates that he has them – the Rogue, Little John, and Aero-Hi are all on the same sheet, saving me from having to buy 2 sets of decals.
  3. Do I have some or all of the parts? In this case, yes, including the Excelsior decals, which I purchased when I cloned the Little John.
  4. Any gotchas in the builds? Pretty straight forward 4FNC (4 fins and a nose cone) construction, with tri-color paint jobs. However, I did notice that the Rogue fins are of thin 1/16″ balsa, which have a tendency to warp when you apply sanding sealer or water-thinned Fill N Finish. Best to paper laminate them, which will solve the warping issue, and add a lot of strength to the fins.
The next steps are to print out the instructions and to gather the parts from my various bins and boxes. Shown below are the components of the Aero-Hi; you can see that I have already applied Fill N Finish (mentioned in Part 2 of this series) to the body tube seams. The old brown-colored Estes/Centuri tubes have little in the way of spirals and often require no filling; however, the new white tubes often have deep spirals, which easily show in the painted model unless filled.
 The 1st step in the instructions for both rockets call for assembling the 13 mm motor mount, which I followed, EXCEPT for cutting small notches in the forward centering rings. The BT-20 main tube is rather small in diameter, and I like to have as much room for the parachute as possible. So I am opting to forego the standard Estes tri-fold paper shock cord  mount in favor of the Quest-style mount, in which thin 100# kevlar flame resistant (but not flame proof) thread is tied around the motor mount tube and passed through the notch in the centering ring. The shock cord is then tied to the thread (see image below). An important point is that the kevlar thread should not be so long as to stick out of the body tube, else the stress of ejection could result in a “zipper”, in which the thread cuts down through the body tube like a knife.
Body tube spirals filled, motor mounts assembled. We will continue on in Part 4…

Sunday, September 28, 2014

More stuff I use to build rockets...

Continuing on with tools…
  • Alignment guides – In my last post, I mentioned alignment marks for fins, launch lugs, etc. When you build a kit, it usually has an alignment guide printed in the instructions which is to be cut out and wrapped around the body tube. For unusual designs like the Estes Interceptor, you still should do this; however, for most LPR rockets there are other ways. You can print out your own fin wrap by using online tools, such as those at Payload Bay. Or you can spend few bucks to buy a fin alignment guide set from Estes, which contains the yellow parts in the pic below:
The set has a long v-shaped piece of plastic (bottom of image), which can be used to draw fin lines on BT-50 and smaller tubes. For larger diameter tubes, I prefer the aluminum T-shape above it – you can use it to draw nice straight lines down the body tube, which beats the heck out of the “use a door frame” method mentioned in the old kit instructions. The circular plastic pieces are used to place fin marks at the bottom of the tube; just pick the one that fits and draw the marks above the lines in the plastic. Works great with 3 and 4 finned rockets!
  • Filler – For filling tube spirals, you can’t do much better than Elmer’s Fill N Finish (shown above), available at hardware stores or online. Mix it with water until you have the consistency of mustard, and apply it with a brush to the spirals. Let it dry a few hours, sand the tube with 320 grit, et voila! No more seams. You can also use it to fill the grain on balsa nose cones and fins, but I don’t use it much for this purpose as it does not harden the balsa the way sanding sealer does. I DO use it often to fix dings in balsa parts and fill gaps – can’t live without it! Fill N Finish is non-toxic and cleans up with just water, so it is good to use with kiddos around.
  • Sealer – This is the old school and stinky way to fill balsa grain. Shown below is Aero Gloss Sanding Sealer, available at local and online hobby shops. Multiple coats (4 or 5) applied with a brush to the fins or nose cone will give you a hard balsa surface with a smooth plastic-like finish unachievable by other methods. However, the fumes will kill ya, so use in a well ventilated room or outdoors. Not safe for the kids or around the wife, who will unleash heck upon you for stinkin’ up her house!
  • Masking tape – Most paint schemes call for different colors on the various parts of the rocket, which means masking. Here, the choice of tape is all-important to get nice sharp lines and avoid bleeds. You do NOT want to use the blue 3M tape shown below; it was designed for house painters, not rocket builders, and makes for terrible bleeds. Some folks swear by Scotch transparent tape and have good results, provided they spray an additional coat of the base color after masking and before the final color (this helps seal the tape edges, avoiding bleeds). I use the Tamiya yellow tape at the top of the pic – it comes in different widths, conforms well to the surface, and adheres nicely. Much more expensive than Scotch tape, it is also very forgiving; I have never had a bleed using this stuff.


  • Paint – Pretty much a personal choice. I use Industrial Krylon (a laquer based paint) because it is resistant to running, dries quickly, and you can recoat anytime. Others use Rustoleum or enamels, though the latter take a LONG time to dry. Still others forego the rattle can to get spectacular results through airbrushing.

Friday, September 26, 2014

The way I build rockets - Part 1

(This was on my old blog, but I thought some might find it useful. Besides, I should have it posted here somewhere)
As time has moved along, I have gotten better at building rockets – at least in the sense of finishing and making them look good. I have gone from the classic 10 foot rocket (“rocket looks good from 10 feet away”) to 3 foot rockets, and even the occasional one foot rocket. It is a learning process, accomplished mainly through trail and error and reading the online forums (Ye Olde Rocket Forum) and blogs (Model Rocket Building by Chris Michielssen). However, the joy in turning a cardboard tube and some balsa into a flying, eye-catching rocket is a major high for me, and I’m sure you’ll like it too!
Clone of the Estes Scamp
Before I start discussing tools, there are a couple of things you absolutely need to turn out a decent model:
  • Think about the build – Even when building a kit, you need to think about how you will get to the end product. Does the body tube have spiral seams that need filling? Does it have tube fins, pods, or hard-to-get-at surfaces that may require finishing and painting before they are attached? Do you wish to replace the shock cord mount with another like the “Quest type” to free up more space for the parachute or streamer? The answers to these and other questions will determine how you proceed with the build, so it is good to resolve them up front before you are faced with a gotcha.
  • Have patience – Nothing good ever comes from rushing a model build; in fact, my biggest mistakes have come when trying to hurry a model for a launch or trying to get it finished and painted before a rain front moves in. Allow plenty of time, especially for finishing and painting, which takes far longer than the building for most LPR birds. The sun will return and there is always another launch, so don’t pressure yourself.
Building a rocket requires the right tools. Here are the ones I use, in no particular order:
  • Glue – Aileen’s Original Tacky Glue is what I use to attach fins; it sets up quickly and provides a strong bond. I use wood glue (Titebond) for fin fillets or wood-to-wood joints.
  • Knife – X Acto #1 knife with #11 fine point blades – is there anything else? Blades are cheap, so ensure yours is sharp by replacing it fairly frequently (How often depends on use and materials you cut).
  • Sandpaper – Various grits, all the way from 150 to 2000. I use 150 to shape plywood and dowels, 220-240 to shape basswood and balsa, 320 to smooth fins and body tubes, and 400 for smoothing the finish (sanding paint base coats). 1000/2000 grit is good for removing paint spots and tiny imperfections – you can get these from hobby shops like RC Hobbies here in town or order it online. You will not find anything finer than 400 grit at Home Depot. Have plenty of sandpaper, because you will be doing a LOT of sanding!
  • Sanding blocks – You CAN sand fins and finishes with just sandpaper in your hand, but a sanding block (small wooden block or t-shaped piece of aluminum) gives you a lot more control, especially when you are trying to put angled edges on that scale model or smooth fin surfaces (fingernails can scratch balsa easily). These are also cheap and available online and at hobby/craft stores; you can make wood ones yourself from scrap plywood if you are so inclined.
  • Tack cloths – Once you have done the actual building, you will need to keep the rocket clean while you add primer and paint, as there is some sanding in between coats. Paper towels and soft rags help to some extent, but I have found that they always leave small particles and junk that cause unsightly bumps in the paint. A tack cloth is a sticky piece of cheese cloth that will actually grab the dust and gunk as you wipe the rocket down (see pic at bottom). Available online or at Hobby Lobby or Michaels for a couple of bucks each, they are indispensable for getting a good finish!
  • Rulers – Absolutely, positively essential! I have a couple of plastic ones that I use to make measurements, and a thin metal ruler I use as a knife guide to cut fins, patterns, and decals/markings. Only way I am able to cut a straight line!
These are the basics – I have left out very obvious things like pencils and sharpies used to mark alignment lines, etc. However, a good build requires more than just the basics, especially in marking alignment lines, cutting body tubes, and filling seams and other imperfections. I’ll cover those in part 2…

Sunday, September 21, 2014

Small stuff...

I'm still working on the Viking 7 scale model - it's in paint, but there are imperfections that need fixin'. Today's wind did not allow for any painting, so I hope to catch a day this week for the final coats. Daylight hours are getting fewer and it will not be long before rocket finishing activities like sealing and painting will be confined to the weekends. I have enough trouble seeing in the day, let alone the dark.

I did manage to complete painting the K-53 Stinger in its all white scheme (can you say bland?), and it is now awaiting decals. The Estes Wizard is finished in the purple and white 1980's decor, with a decal provided by Excelsior Rocketry. I hate the modern look - blue with peel n' cuss stickers. This is definitely one time where older looks better…

Modern Estes Wizard.
My Wizard in the 1980's style (click to enlarge).
Following tradition, I started another rocket yesterday - a clone of the Centuri Nova. Its small rear end gives it a different look, and you can build it for either nose or rear ejection. I went conventional, as I like my parachutes to emerge from the rocket's top, not its bottom. Fins were attached during last night's Star Trek ("The Man Trap"), and it will be ready to have the balsa parts sealed this week. Still debating the paint scheme for this one; I will be happy to entertain any suggestions.

I have had several (6) very small Quest rockets (from their Micro Maxx line) lying around for a while - these tiny puppies use small (6 mm diameter, 1" long) motors to propel themselves 50-200 feet into the air. Designed for backyard flying, many do not even have recovery devices, as they are so light weight they gently fall to the ground. Quest quit offering the rockets (outside of starter sets or bulk packs) a while ago, but they still sell the motors; Jim Flis at Fliskits continues to design and sell some pretty nice Micro Maxx kits for those interested. Anyway, Chris Michielssen (author of the Model Rocket Building blog) posted a new launch set, sans motors, on eBay. The price being right, I snagged it up and it arrived in yesterday's mail. Now all I have to do is to get a few Micro Maxx motors and I will be set for a little flying in my apartment building's parking lot. :)

My Micro-Maxx collection (click to enlarge).

Saturday, September 13, 2014

Inventory time...

The TARC season officially begins in September, which gives me a good excuse to inventory my rocket stuff. After all, one must know what one has in order to help out the local rocket teams… and to ensure I have what I need for the start of next year's flying season.

Today was inventory day for the conventional black powder (Estes and Quest) motors. I hauled out the stash, dumped things unceremoniously on the floor, and started sorting. 3 hours later, I have the count - 552 usable bp motors (this does not include the archaic "old as the hills" motors I have from the Stone Age - kinda afraid to risk a rocket with one of those). The nice thing about doing an inventory is that not only do find out what you need (A10-3T's and D12-3's), but you also discover what you do not need (A8-3's). I have 122 - that's right, 122 - stinking A8-3 motors! In my defense, I did not buy this many; whenever folks give me rocket gear, it usually includes a few A8-3's. Since the A8-3 is a bit underpowered for most rockets I don't use them often, so they stay in the stash and accumulate like Tribbles (well, maybe not that extreme). In brief, the A8-3 is boring.

Fortunately, we have the return of Rocket City Blast Off this October. Maybe I can give away a bunch to members of the public who want to fly their rockets but have no more motors. This is plan A for reducing the tally. Plan B involves a lot of flights of an Estes Cobra or Ranger, a Semroc Goliath, or some other 3 18 mm motor cluster rocket. 40 flights, and I will have depleted the backlog. Should take about 3 years, during which time, I will have received another 100 or so A8-3's :/

No Mas!
I just gotta say no when someone offers me that motor.

I also put in a little work on some rockets today - the Viking 7 scale model is in primer, the Wizard has its base coat of white paint, and I am going to attach the fins to the #1905 Estes Stinger tonight. The K-53 Stinger clone is built, awaiting filling and sealing of the balsa surfaces.

Sunday, September 7, 2014

A case of mistaken identity...

Estes, the largest model rocket manufacturer, has been producing kits for decades, all the way back to the first years of the 1960's. A lot of kits have been released over these many years, some of which have been assigned names belonging to previous releases no longer in production at the time of the kit design. As a result, we have a couple of Renegades (very sad; the current "Renegade" is a monstrosity compared to the sleek red and black beauty of the 70's), Yellow Jackets, X-rays, and quite a few Sizzilers, to name just a few. This state of affairs presents no problems to a rocket newbie, but can create cloning/parts issues to a rocket geezer like myself. It forces us to have to do some research when ordering parts like laser cut fins, or we can easily end up with a set or piece belonging to the other model(s). This has happened to me, and it is about to be set right.

Some time ago, I received from a friend a bunch of old rocket kits owned by an educator who was very much into rockets before he passed away. There were some real gems in this collection - an original Estes Trident in near mint condition, a couple of older Big Berthas, several Solar Launch Controllers, and a few other goodies. There were also some kits in very bad shape - crushed fins and body tubes. Among these were a couple of Estes Icarus and Stinger kits. Dating from the 1980's, they looked like they had been sat upon by the namesake of the Big Bertha; little else but the nose cones, centering rings, and engine hooks were salvageable. Not a problem - my favorite rocket company, Semroc, had the fins and body tubes in stock. I placed an order for the parts, and a short time later, an Icarus rose from the ashes.

Not true for the Stinger.

The Semroc fin set perplexed me, as it looked nothing like the fins of the rocket in the kit art or in the catalog. The Stinger in the 1983 catalog had traditional swept fins with pointy ends; the ones from Semroc had a steeper sweep, and the back tips were cut flat, like on the upper stage of the Estes Midget. Not like Carl at Semroc to make a mistake, so what was going on?

#1905 Stinger in Estes 1983 catalog (click to enlarge).
Turns out I should have done some Googling before making my order, as a quick search ended the confusion. There was a Stinger kit by Estes which went out of production a decade before the #1905 Stinger appeared in 1983. This Stinger, #K-53, was never featured in any Estes catalog and was given out to customers who made an order over $5.00 from 1970 to 1973. A freebie, to thank folks for their business. I did order some things by mail from Estes back then, but they were $1-2 affairs for things I could not find at A&M Toy Store or Eastgate Hobbies - both these places were well stocked with kits and a fair number of parts. That's why I was unaware of the K-53 Stinger. I took a look at the instructions for that kit online and the Semroc fins were a perfect match to the fin pattern.
Kit art for the Estes K-53 Stinger (click to enlarge).
Mystery solved. The fin set was stashed away for a future build. This was 2 years ago (I think).

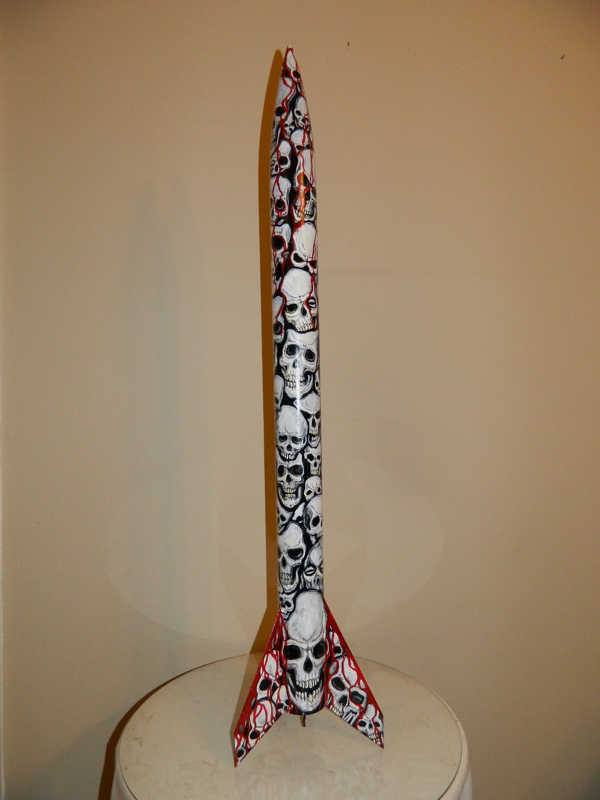
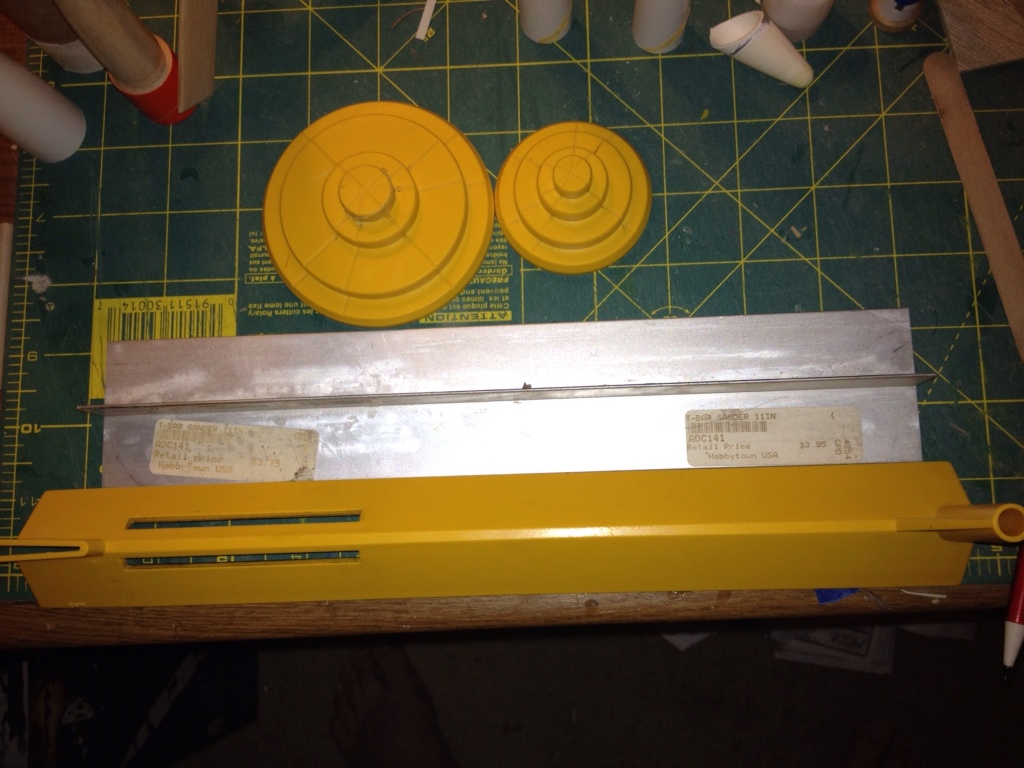
This weekend, a post on Ye Olde Rocket Forum jogged my memory of this incident, and being in the mood for something simple to go along with the Rocketarium Viking 7 build, I pulled out the parts and started to build the forgotten ancestor of the #1905 Stinger. It's a skinny, ungainly looking rocket, but the fact that it was not in any catalog gives it an aura of uniqueness. 

I think I will also build the 1983 model. It will mean hand cutting the fins, but hey, I should be able to handle cutting a few straight lines by using my trusty metal ruler and hobby knife (adds bandaids to iPhone grocery list). The contrast between the two models will be interesting.

Sunday, August 31, 2014

Heavy artillery...

While I was visiting the Air and Space Museum near Dulles last month, I ran across the Tiny Tim rocket, developed during World War II. The simplicity and aesthetics of this weapon appealed to me immediately:

Tiny Tim rocket on display at the Air and Space Museum (click to enlarge).
The short description also interested me:

The Tiny Tim air-to-ground missile was the largest American rocket in service during World War II. Loaded with TNT, it could destroy coastal defense guns, pill boxes, bridges, tanks, and ships. Tiny Tims sank at least one Japanese ship and seriously damaged another. During the Korean war, one Tiny Tim knocked out a key bridge. Visible in this partial cutaway are simulated solid propellant sticks and some of the rocket's 24 exhaust nozzles.

A Google search yielded more info. This 10 foot long puppy carried a 148 lb warhead up to 1600 yards and had a thrust of 3,000 lbs. It was typically mounted underneath aircraft, as you can see from the below images:


Top: Tiny Tim mounted on a P-51 Mustang.
Bottom: Tiny Tim being fired from a SB2C Helldiver.
Today it rained muchly, which put the kibosh on priming/painting rockets (I did get manage to glue the fins on the Viking, though). A little water is not sufficient to stop the rocketry bug; I remembered this rocket from my trip and fired up the computer to create a design of a flying model. The first part is always the most difficult - choosing a scale. This is largely driven by two things - the diameters of the available body tubes and the sizes/shapes of the available nose cones. I knew I wanted this rocket to be at least BT-70 (2.217 inches) in diameter and the Fliskits' upscaled Deuces Wild nose cone for this tube looked to be the right shape. This being decided, it was fairly easy to take the dimensions of the real Tiny Tim and work out a scale - 1/5.2774. Not a nice fraction, but hey, we have computers now, don't we?

This gave an overall rocket length of 23 inches. Subtract 4 inches for the nose, and you are left with 19 inches for the body tube. I knew I would probably need nose weight, so I split it into a 3 inch payload section and a 16 inch sustainer. Inspired by the 24 exhaust nozzles of the original, I went with a 5 motor cluster as the power plant - 4 13 mm motors (Estes A10's) and a single 24 mm motor. Such a combo would allow for many different motor configurations (1, 3, or 5), producing altitudes to suit launch field constraints and my mood. It should also instill terror in my friends when they see me try to light 5 motors simultaneously.

It took a couple of hours to get all the measurements and do the design in Open Rocket. It turns out that I need about 1.5 ounces of weight up front to insure stability, but even with this a single D12 should send Tiny Tim to over 500 feet. 4 A10's and a D12 will put it at around 870 feet, and an E30 will produce a max speed of about 0.5 Mach and a peak altitude of 1350 feet. Not too shabby.

Tiny Tim design in Open Rocket (click to enlarge).
After finalizing the design, I also played around some more with the photo rendering feature of Open Rocket. I was able to render my version of the Tiny Tim as if it were just launched from a plane to a surface target. I am really beginning to like this software - It's quite powerful (as long as you stick to basic rocket designs), and you can't beat the price (free).

Tiny Tim rendered in Open Rocket (click to enlarge).
This will be the next rocket project once I finish with the Wizard and Viking I am currently building. Time to start gathering the parts…